Storywriter Pro Quickstart Guide
Welcome to the Storywriter Pro Quickstart Guide. Expand the topic you want to learn about.
Chapters & Scenes
Your story in Storywriter Pro is structured using chapter and scene cards.
Chapter Cards
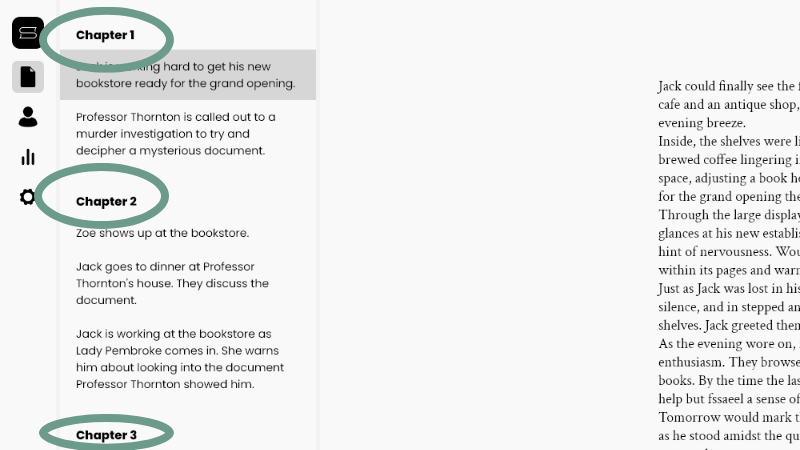
You can use the writing area of your chapter cards to:
- Outline your story beats
- Jot down notes
- Keep track of your research
Note: What you write here is for your eyes only — chapter card content is not included when you export your story.
How to add chapter cards:
- Click the plus sign in the chapter/scene list and select ‘New chapter’. → New chapter is added to the end of your story.
- Right-click any existing chapter or scene card. → You’ll see options to insert a chapter above or below that card.
Right-clicking a chapter card also lets you:
- Rename the card
- Delete the card.
Note: Deleting a chapter card also deletes all scenes inside it. If you want to keep any scenes, move them out before deleting.
Scene cards
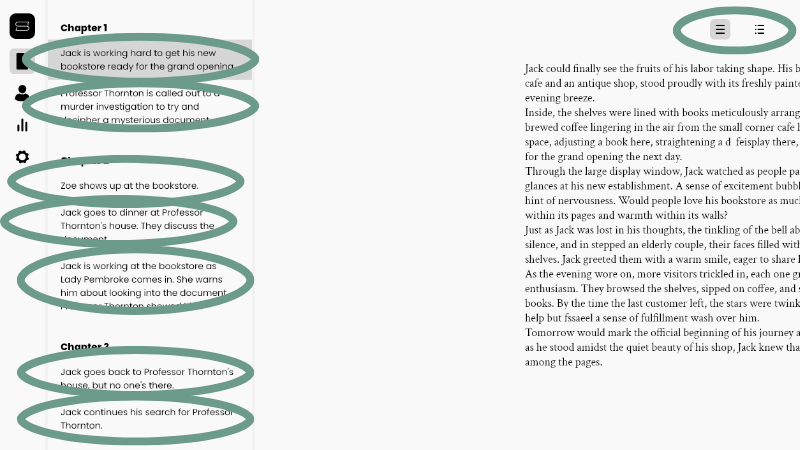
Each scene card has two writing areas:
- Story area (text icon): This is where you write your actual scene. All story areas are merged into one document when you export.
- Outlining area (list icon): Use this space for outlining, notes, and research. What you write here will not be exported.
How to add scene cards:
- Click the plus sign in the chapter/scene list and choose ‘New scene’. → New scene is added to the end of your story.
- Righ-click any existing chapter or scene card. → Choose to insert a new scene above or below that card.
Right-clicking a scene card also lets you:
- Rename the scene card
- Delete the scene card
Chapter and Scene Hierarchy
Chapters and scenes are organized in the chapter/scene list on the left.
- Scenes belong to the chapter directly above them
- A chapter continues until a new chapter card appears
- You don’t need to start with a chapter card — you can always add one later
That’s the basic structure — simple and flexible.
Characters
Structurally, groups and characters behave like chapters and scenes — groups contain characters. Use group cards to organize. Use character cards to build character bios.
You can add new cards in two ways:
- Click the plus sign
- Or right-click an existing card to insert a new group or character above or below
Just like with chapters and scenes, you can drag and drop to reorganize groups and characters however you like.
You can organize your characters with groups — or just use character cards. It’s entirely up to you.
How to create character bios:
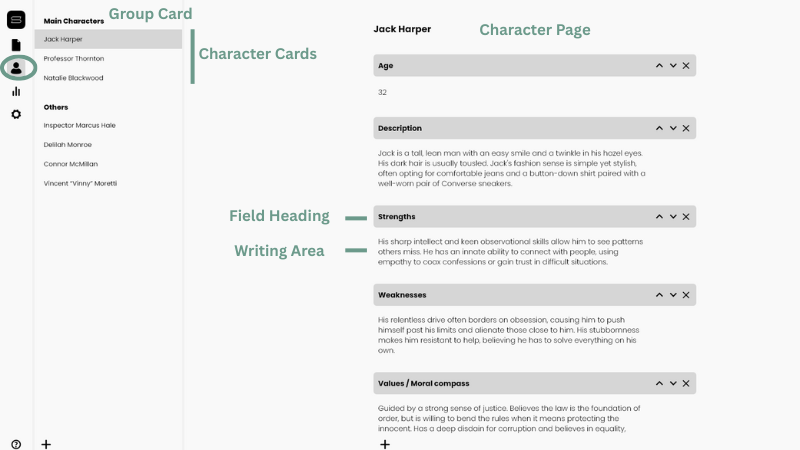
- Create a character card
- Right-click the card to rename your character
- Click the character card to open the character page
- Click the plus sign to add a new bio field
- Use the field heading for a category (e.g., “Eye color”)
- Use the field’s writing area for the specific info (e.g., “Brown”)
- Use the arrows to reorder fields
- Click the ‘X’ to delete a field
Creating character bio templates:
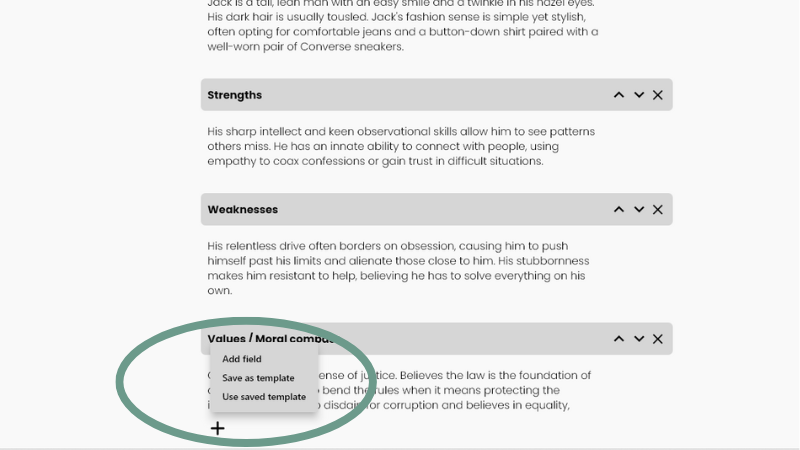
- Add the fields you want to use in your template and name them (e.g., “Strengths”)
- Click the plus sign, then choose ‘Save as Template’
- Name your template and click Save
- To reuse it, click the plus sign again and choose ‘Use Saved Template’
Tip: It’s okay if your character bio fields are already filled in — only the headings are saved to the template, not the content.
Exporting
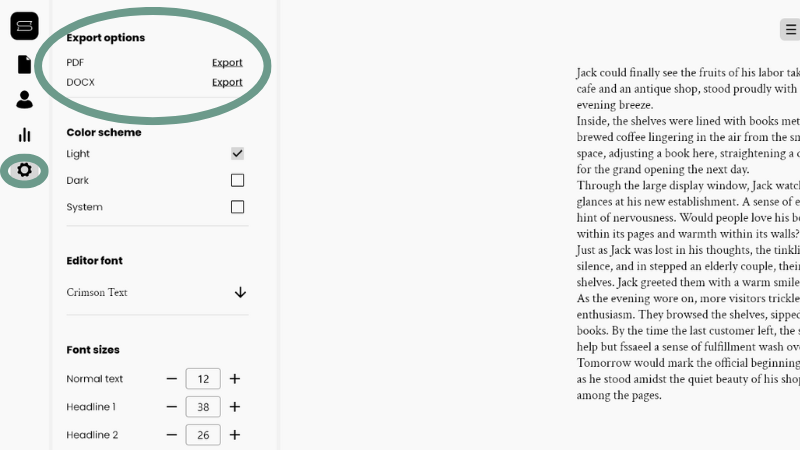
To export your story from Storywriter Pro:
- Go to the settings menu
- Choose your preferred export format: PDF or DOCX (Word)
- Save the file to your preferred location
How the export is structured:
- Only the story areas from your scene cards are included in the export
- Scenes within the same chapter are separated by an empty line in the document
- Scenes from a new chapter start on a new page
Tip: Add chapter headings (e.g., “Chapter 1: The Rise of the King”) at the top of the first scene in each chapter — then they’ll be included in your export.
Tips & Tricks
Here are a few things to help you get the most out of Storywriter Pro:
- Reorganize your story → Drag and drop individual scenes or entire chapters in the chapter/scene list.
- Learn shortcut keys → Click the help icon (‘?’) for a full list of useful shortcuts — show/hide the toolbar, go fullscreen, and more.
- Use writing sprints → On the Stats page (left menu), you can run timed or word-count-based writing sprints.
- Tweak settings to your liking → In the Settings menu (left menu), you can export your story, change fonts, switch between light/dark mode, and more.
- Autosave → Once you’ve saved your project to a location, Storywriter Pro will automatically save your changes as you work.
Just a few things that might come in handy while you’re writing.